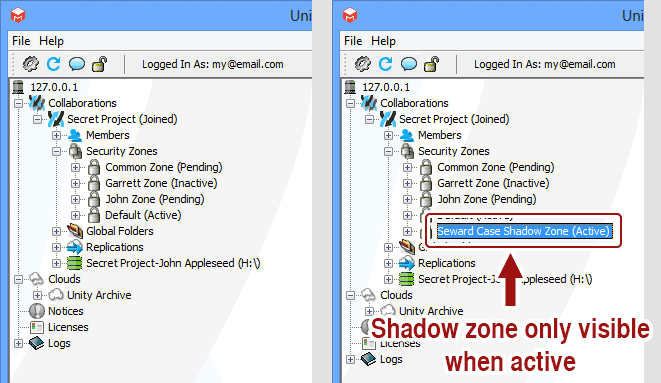
How Do I Access A Shadow Security Zone?
Accessing A Shadow Security Zone
In order to activate a shadow security zone, you must begin by gathering the following information. If you do not have this information, your collaboration administrator will be able to provide it:
- The name or ID of the shadow security zone.
- The password for the shadow security zone.
Why do I need to provide the name or ID of a shadow security zone?
The purpose of a shadow security zone is to completely hide the existence of data associated with the zone from unauthorized members. Folders associated with non-shadow zones are visible to all members, but can only be accessed by members who are part of the security zone and have the password. Folders associated with shadow zones are completely hidden until the zone is activated.
To activate a shadow security zone, bring up the Unity interface (see Displaying The Unity Interface). Then expand the "Collaborations" node, expand your collaboration node, right-click on the "Security Zones" node, and then click on the "Activate Shadow Zone" menu item to display the "Activate Shadow Zone" window.

Enter the zone ID or name that was given to you by your administrator. Note that the case must exactly match the name of the zone. If you enter the name incorrectly, the zone will not activate and you will receive no error message, so ensure the name is being typed correctly. Then, enter the password.

Why is there no error message when I mistype the security zone ID or name?
This is a security measure. A malicious user could use such a message to determine the existence of shadow zones. By providing zero feedback when an invalid zone name is entered and when a zone name is misspelled, we make it impossible to randomly "search" for the existence of shadow zones.
Note that if you enter the zone name or ID correctly, but mistype the password, you are presented with an error message. If the name is entered correctly, we can assume that the user is simply making a mistake, and not attempting a breach.
Now that the shadow zone is active, it is visible in the Unity interface. All files and folders associated with it are now visible and accessible.
